Chapter 39 - Python wheels
Python’s first mainstream packaging format was the .egg file. Now there’s a new format in town called the wheel (.whl). According to the Python Packaging Index’s description, a wheel *is designed to contain all the files for a PEP 376 compatible install in a way that is very close to the on-disk format. In this chapter, we will learn how to create a wheel and then install our wheel in a virtualenv.
Getting Started
Using pip is the recommended way to work with wheels. Make sure you have installed the latest copy of pip as older versions did not support the wheel format. If you’re not sure if you have the latest pip, you can run the following command:
pip install --upgrade pip
If you didn’t have the latest, then this command will upgrade pip. Now we’re ready to create a wheel!
Creating a wheel
First of all, you will need to install the wheel package:
pip install wheel
That was easy! Next, we’ll be using the unidecode package for creating our first wheel as it doesn’t already have one made at the time of writing and I’ve used this package myself in several projects. The unidecode package will take a string of text and attempt to replace any unicode with its ASCII equivalent. This is extremely handy for when you have to scrub user provided data of weird anomalies. Here’s the command you should run to create a wheel for this package:
pip wheel --wheel-dir=my_wheels Unidecode
Here’s a screenshot of the output I received when I ran this:
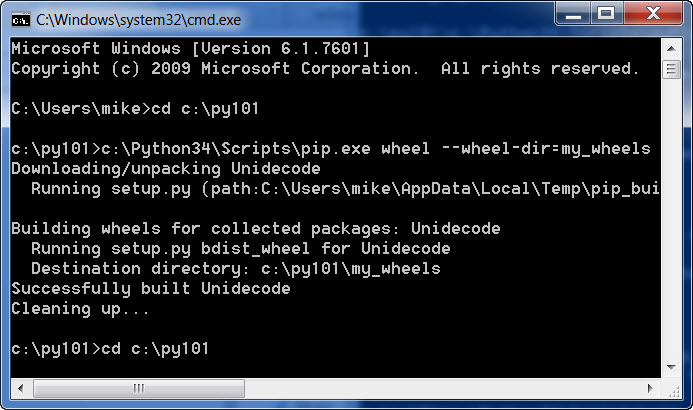
Now you should have a wheel named Unidecode-0.04.14-py26-none-any.whl in a folder named my_wheels. Let’s learn how to install our new wheel!
Installing a Python wheel
Let’s create a virtualenv to test with. We will use the following command to create our virtual testing environment:
virtualenv test
This assumes that virtualenv is on your system path. If you get an unrecognized command error, then you’ll probably have to specify the full path (i.e. c:\Python34\Scripts\virtualenv). Running this command will create a virtual sandbox for us to play in that includes pip. Be sure to run the activate script from the test folder’s Scripts folder to enable the virtuanenv before continuing. Your virtualenv does not include wheel, so you’ll have to install wheel again:
pip install wheel
Once that is installed, we can install our wheel with the following command:
pip install --use-wheel --no-index --find-links=path/to/my_wheels Unidecode
To test that this worked, run Python from the Scripts folder in your virtualenv and try importing unidecode. If it imports, then you successfully installed your wheel!
The *.whl file is similar to an *.egg in that it’s basically a *.zip file in disguise. If you rename the extension from *.whl to *.zip, you can open it up with your zip application of choice and examine the files and folders inside at your leisure.
Wrapping Up
Now you should be ready to create your own wheels. They are a nice way to create a local repository of dependencies for your project(s) that you can install quickly. You could create several different wheel repositories to easily switch between different version sets for testing purposes. When combined with virtualenv, you have a really easy way to see how newer versions of dependencies could affect your project without needing to download them multiple times.